Looty Bay map The 28 buildings of Looty Bay with the 240 loot nodes, 208 containers and 54 locked doors inside them. 33 spots need a key. Pick a building to see what it holds.
Game data BUILD 4049 2026-11-20 North is up. The ground (sea, sand, grass, pavement) is the game’s terrain data, buildings are drawn from its collision shapes (walls, floors, bridges, piers), and markers sit where the placement data built into the game puts them. Pick a building to switch to the plan of one floor. Drag to move, use the wheel or the buttons to zoom.
Arrival points Entering the city puts you at one of 16 arrival points (3 spots each, the arrows on the map). Two of them sit at the west and east ends of the highway. Arriving by helicopter uses 16 separate points in the air around the edge of the city, 100 to 118 m up; switch on “Helicopter arrival points” to see them.
Exit Crossing the rectangle drawn around the city (1,363 m east to west, 1,404 m north to south) takes you out. The highway bridges continue past the line at both ends, so a car can simply drive through. Zoom the map out to see it as a dashed line.
Vehicle terminals There are 19 parking terminals, each with 3–5 slots where the car appears, and 2 helipads (2 slots each). Where to sell There are 4 Fences that buy stolen goods (F on the map) and 2 Smuggler’s vans that buy cargo (V). Sale bonuses Cash withdrawal 13 ATMs and 1 bank counter. Switch on “ATMs and bank staff” to see them. Laundering and cash
On the street 53 dumpsters can be searched (9 times each, for Trash). The event’s Valuable Cargo ($150,000 when sold) can appear at 14 spots.
Security 8 metal detectors and 6 road bollards (they rise in 1.5 s and can be used again after 2 min). 2 of the bollards stand at the west and east ends of the highway, just before the exit line. What a detector reacts to and who may operate a bollard is not stated in the data. Police You take the police role in front of the station on the middle island. A downed officer comes back at one of 6 spots around it, and police cars and the helicopter come from fixed terminals (their tooltips say so). How the police work Cottage (house5) Loot comes back after 3 min, alarmed, 4 cameras
Floor plan and what the loot is worth
Lower floor Upper floor
Loot nodes Containers Cupboard ×5 1.5 s to open Safe ×1 0.35 s to open Keys needed Loose valuables 3 locked doors / 4 cargo spawns / 16 random item spots / 2 hiding spots
Cottage (house9) Loot comes back after 3 min, alarmed, 2 cameras
Floor plan and what the loot is worth
Lower floor Upper floor
Loot nodes Containers Cupboard ×9 1.5 s to open Safe ×2 5 s to open, Mini Drill 60 s Keys needed Loose valuables 3 locked doors / 14 cargo spawns / 9 random item spots / 3 hiding spots / 1 hackable computers
Cottage (house10) Loot comes back after 3 min, alarmed
Floor plan and what the loot is worth
Loot nodes Containers Cupboard ×5 1.5 s to open Safe ×1 0.35 s to open Loose valuables 2 locked doors / 4 cargo spawns / 12 random item spots / 3 hiding spots
Cottage (house6) Loot comes back after 3 min, alarmed, 1 cameras See the job card
Floor plan and what the loot is worth
Loot nodes Containers Cupboard ×9 1.5 s to open Safe ×1 5 s to open, Mini Drill 60 s Keys needed Loose valuables 3 locked doors / 6 cargo spawns / 14 random item spots / 2 hiding spots / 1 hackable computers
Cottage (house8) Loot comes back after 3 min, alarmed, 1 cameras See the job card
Floor plan and what the loot is worth
Loot nodes Containers Cupboard ×6 1.5 s to open Safe ×1 1 s to open Keys needed 2 locked doors / 5 cargo spawns / 11 random item spots / 4 hiding spots
Grand Hotel Loot comes back after 3 min, alarmed, 5 cameras See the job card
Floor plan and what the loot is worth
Lower floor Upper floor
Loot nodes Containers Safe ×2 5 s to open, Mini Drill 60 s Cupboard ×2 1.5 s to open Keys needed Loose valuables 1 locked doors / 10 cargo spawns / 16 random item spots / 1 hackable computers / Shops: City jewelry store
Convenience Store: West Loot comes back after 3 min, alarmed, 1 cameras See the job card
Floor plan and what the loot is worth
Loot nodes Containers Cupboard ×6 1.5 s to open Safe ×1 1 s to open Safe ×1 5 s to open, Mini Drill 60 s Keys needed 3 locked doors / 6 cargo spawns / 4 random item spots / 2 hiding spots / 1 hackable computers / Shops: City convenience store
Jewelry Store: West Loot comes back after 3 min, alarmed, 4 cameras See the job card
Floor plan and what the loot is worth
Loot nodes Containers 2 locked doors / 4 cargo spawns / 17 random item spots / 2 hiding spots / Shops: City jewelry store
Equipment Store: West Loot comes back after 3 min, alarmed, 1 cameras See the job card
Floor plan and what the loot is worth
Loot nodes Containers Safe ×2 5 s to open, Mini Drill 60 s Cupboard ×5 1.5 s to open Keys needed 1 locked doors / 5 cargo spawns / 2 random item spots / 1 hackable computers / Shops: City equipment store
Gun Shop: West Loot comes back after 3 min, alarmed, 1 cameras See the job card
Floor plan and what the loot is worth
Loot nodes Containers Safe ×2 5 s to open, Mini Drill 60 s Cupboard ×6 1.5 s to open Keys needed 1 locked doors / 5 cargo spawns / 13 random item spots / 1 hiding spots / 1 hackable computers / Shops: City gun shop
Pharmacy: West Loot comes back after 3 min, alarmed, 1 cameras See the job card
Floor plan and what the loot is worth
Loot nodes Containers Safe ×1 1 s to open Cupboard ×7 1.5 s to open Safe ×1 5 s to open, Mini Drill 60 s Keys needed 2 locked doors / 5 cargo spawns / 5 random item spots / 2 hiding spots / 1 hackable computers / Shops: City pharmacy
Electronics Store: West Loot comes back after 3 min, alarmed, 1 cameras See the job card
Floor plan and what the loot is worth
Loot nodes Containers Cupboard ×2 1.5 s to open Safe ×1 1 s to open Keys needed 1 cargo spawns / 13 random item spots / Shops: City electronics store
Seasons Hotel Loot comes back after 3 min, alarmed, 1 cameras See the job card
Floor plan and what the loot is worth
Loot nodes Containers Safe ×1 1 s to open Cupboard ×4 1.5 s to open Keys needed 3 locked doors / 3 cargo spawns / 9 random item spots / 1 hiding spots / Shops: City liquor seller
Reef Hotel Loot comes back after 3 min, alarmed, 2 cameras See the job card
Floor plan and what the loot is worth
Loot nodes Containers Cupboard ×7 1.5 s to open Safe ×2 5 s to open, Mini Drill 60 s Safe ×1 1 s to open Keys needed 2 locked doors / 8 cargo spawns / 11 random item spots / 1 hiding spots / 1 hackable computers / Shops: City liquor seller
Strip Club Loot comes back after 3 min, alarmed, 3 cameras See the job card
Floor plan and what the loot is worth
Lower floor Upper floor
Loot nodes Containers Safe ×2 5 s to open, Mini Drill 60 s Cupboard ×7 1.5 s to open Safe ×1 0.35 s to open Keys needed Loose valuables 1 locked doors / 7 cargo spawns / 19 random item spots / 5 hiding spots / 1 hackable computers / Shops: City liquor seller
Ocean Breeze Café Loot comes back after 3 min, alarmed See the job card
Floor plan and what the loot is worth
Loot nodes Containers Safe ×1 1 s to open Cupboard ×2 1.5 s to open Keys needed 2 locked doors / 2 cargo spawns / 9 random item spots / Shops: City liquor seller
Police Station Loot comes back after 3 min, alarmed, 4 cameras See the job card
Floor plan and what the loot is worth
Lower floor Upper floor
Loot nodes Containers Safe ×3 5 s to open, Mini Drill 60 s Cupboard ×1 1.5 s to open Keys needed Loose valuables 2 locked doors / 10 cargo spawns / 22 random item spots / 1 hackable computers
Art Gallery Loot comes back after 3 min, alarmed, 4 cameras See the job card
Floor plan and what the loot is worth
Lower floor Upper floor
Loot nodes Containers Safe ×2 5 s to open, Mini Drill 60 s Keys needed Loose valuables 1 locked doors / 8 cargo spawns / 57 random item spots / 4 hiding spots / 1 hackable computers
Looty Bay Bank Loot comes back after 4 min, alarmed, 4 cameras, vault door See the job card
Floor plan and what the loot is worth
Lower floor Upper floor
Loot nodes Containers Safe ×3 5 s to open, Mini Drill 120 s Deposit box ×12 1.5 s to open Keys needed Loose valuables 1 locked doors / 9 cargo spawns / 6 hiding spots
Electronics Store: East Loot comes back after 3 min, alarmed, 2 cameras See the job card
Floor plan and what the loot is worth
Loot nodes Containers 2 locked doors / 4 cargo spawns / 6 random item spots / 2 hiding spots / Shops: City electronics store
Convenience Store: Bridge Loot comes back after 3 min, alarmed, 1 cameras See the job card
Floor plan and what the loot is worth
Loot nodes Containers Cupboard ×6 1.5 s to open Safe ×1 1 s to open Safe ×1 5 s to open, Mini Drill 60 s Keys needed 3 locked doors / 6 cargo spawns / 4 random item spots / 2 hiding spots / 1 hackable computers / Shops: City convenience store
Gas Station Loot comes back after 3 min, alarmed, 1 cameras See the job card
Floor plan and what the loot is worth
Lower floor Upper floor
Loot nodes Containers Cupboard ×9 1.5 s to open Safe ×3 5 s to open, Mini Drill 60 s Safe ×1 1 s to open Keys needed 4 locked doors / 19 cargo spawns / 4 random item spots / 4 hiding spots / 2 hackable computers / Shops: City convenience store, City car parts shop
Pharmacy: East Loot comes back after 3 min, alarmed, 1 cameras See the job card
Floor plan and what the loot is worth
Loot nodes Containers Safe ×1 1 s to open Cupboard ×7 1.5 s to open Safe ×1 5 s to open, Mini Drill 60 s Keys needed 2 locked doors / 5 cargo spawns / 5 random item spots / 2 hiding spots / 1 hackable computers / Shops: City pharmacy
Convenience Store: East Loot comes back after 3 min, alarmed See the job card
Floor plan and what the loot is worth
Loot nodes Containers Safe ×1 1 s to open Cupboard ×4 1.5 s to open Keys needed 2 locked doors / 3 cargo spawns / 3 random item spots / 1 hiding spots / Shops: City convenience store
Rusty Burgers Café Loot comes back after 3 min, alarmed, 1 cameras See the job card
Floor plan and what the loot is worth
Loot nodes Containers Cupboard ×4 1.5 s to open Safe ×1 1 s to open Keys needed 2 locked doors / 3 cargo spawns / 7 random item spots / 2 hiding spots / Shops: City liquor seller
Jewelry Store: East Loot comes back after 3 min, alarmed, 4 cameras See the job card
Floor plan and what the loot is worth
Loot nodes Containers 2 locked doors / 4 cargo spawns / 17 random item spots / 2 hiding spots / Shops: City jewelry store
Gun Shop: East Loot comes back after 3 min, alarmed, 1 cameras See the job card
Floor plan and what the loot is worth
Loot nodes Containers Safe ×2 5 s to open, Mini Drill 60 s Cupboard ×6 1.5 s to open Keys needed 1 locked doors / 5 cargo spawns / 13 random item spots / 1 hiding spots / 1 hackable computers / Shops: City gun shop
Equipment Store: East Loot comes back after 3 min, alarmed, 1 cameras See the job card
Floor plan and what the loot is worth
Loot nodes Containers Cupboard ×5 1.5 s to open Safe ×2 5 s to open, Mini Drill 60 s Keys needed 1 locked doors / 5 cargo spawns / 2 random item spots / 1 hackable computers / Shops: City equipment store
 Cash ×23 pulls × 300–1,200, locked
 Costume Jewelry ×223 pulls × 1–2
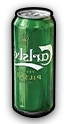 Alcohol ×43 pulls × 1–2
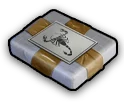 Powder ×15 pulls × 1
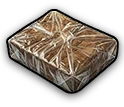 Brick ×73 pulls × 5
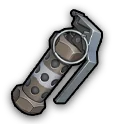 Flash Grenade ×14 pulls × 1
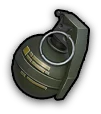 Frag Grenade ×29 pulls × 1
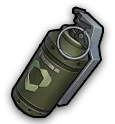 Gas Grenade ×28 pulls × 1
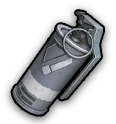 Smoke Grenade ×13 pulls × 1
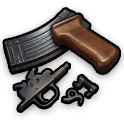 Weapon Parts ×33 pulls × 1–2
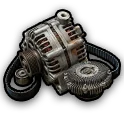 Car Parts ×103 pulls × 1–2
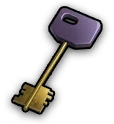 Safe Key
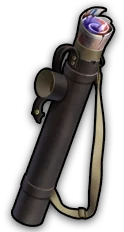 Painting ×1
 Keycard
 Cheap Antiques ×33 pulls × 1–2
 Room Key
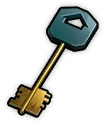 Safe Key
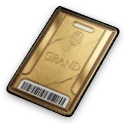 Keycard
 Buletti Soltempra ×1
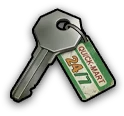 Room Key
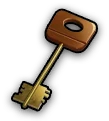 Safe Key
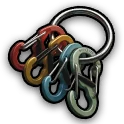 Carabiner Set ×73 pulls × 1–2
 Room Key
 Room Key
 Medications ×83 pulls × 1–2
 Room Key
 Safe Key
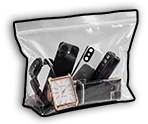 Electronics ×43 pulls × 1–2
 Safe Key
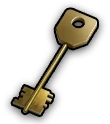 Safe Key
 Room Key
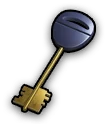 Safe Key
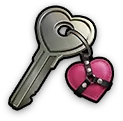 Room Key
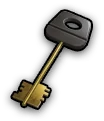 Safe Key
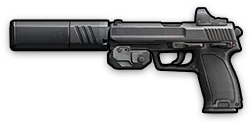 DP-9 Mk2 ×1
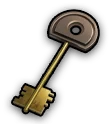 Safe Key
 Keycard
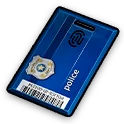 ID Card
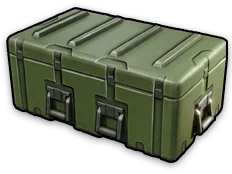 Weapon Parts Box ×3
 Keycard
 BIG EGG #53 ×1
 Fragile Figurine ×3
 Gold Bar ×79 pulls × 1
 ID Card
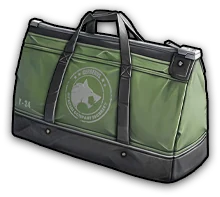 Bank Money Bag ×5
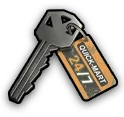 Room Key
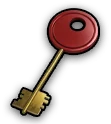 Safe Key
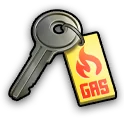 Room Key
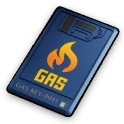 Room Key
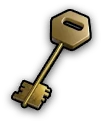 Safe Key
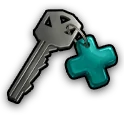 Room Key
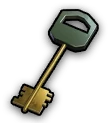 Safe Key
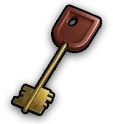 Safe Key
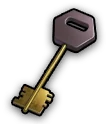 Safe Key
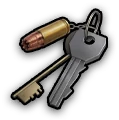 Room Key
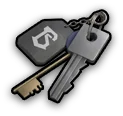 Room Key